This tutorial shows how to create your own website using Luasmith static site generator and Codeberg development platform. It is assumed that you already made a Codeberg account and have some basic knowledge on how to use git, but besides that there are no other requirements; I will explain some things you may be not familiar with if you never made a static website before, although I will try to avoid going too deeply into the details, thus I hope this tutorial may be fairly called a beginner’s guide. This article may as well be considered a “devlog”, because it explains step-by-step how I made this website you’re visiting right now, I wrote this page while actually creating the website.
About Luasmith
Luasmith is a static site generator, among many, that is tiny (a single binary with no dependencies that is less than 500 KiB in size, gzip compressed) and quite minimal out of the box, yet very flexible and extensible. While providing the base necessary functionality for your blog or a small website (converting Markdown to HTML, links checking, syntax highlighting, etc), it allows to heavily change what the generator should do with your content and how to turn it into web pages; and you don’t have to learn new exotic languages or deal with various restrictions (that you may find in other generators) since everything is scripted in Lua: a quite old (as a good wine), well-established and commonly used scripting language, so you will feel at home if you already know Lua, as Luasmith uses built-in standard Lua 5.5 interpreter with complete standard library and some extra additions for convenience. You can download the program from releases on Codeberg, there are builds for Windows, Linux and also a “universal” build that also runs on OS X and most BSDs. If you need to run Luasmith on some other platform, it is extremely trivial to compile.
Take a note that at the point of writing this tutorial the latest version of Luasmith is 0.10. While it is working great and you can complete most of the tutorial and make your own website with it, at some part of the tutorial I demonstrate the usage of a theme for Luasmith that isn’t compatible with version 0.10, as it depends on some changes that were added after that release. If you want to fully complete the tutorial and if 0.10 is still the latest version when you read this article, you have to build Luasmith from latest sources.
Creating a minimal blog
In this tutorial I show terminal commands that work on Linux with Bash shell. If you use another environment, don’t forget to change the commands if needed. Let’s start by making a directory for our website and initializing a git repository:
mkdir -p website/content
cd website
git init
The content directory is where you place the content files for Luasmith to process. The name “content” is a convention and is expected by default, but you can name it differently if you really want to. You can write the content of your articles in Markdown; if you never worked with this markup language before, it very easy to learn, due to its minimalistic, human-readable (and easily human-writable) syntax. Besides the syntax defined in the CommonMark specification, Luasmith supports GFM-like tables, footnotes, strikethrough (using tilde marks, e.g. ~~text~~ becomes text) and raw HTML. I made this page by creating Making this website.md file in the content directory, but it doesn’t only content the text itself, but also a front-matter, the page’s metadata for Luasmith. A front-matter can be written in either YAML, JSON or Lua, but I recommend to always write it in Lua, because the support of other formats is limited. For this page, the front-matter is this:
[[
title = 'Making a website using Luasmith and Codeberg'
date = '2026-11-03'
]]
The date property can be in either YYYY-MM-dd or YYYY-MM-dd hh:mm:ss format. The other properties that you can set in a front-matter depend on a theme you use (I will explain what are themes below), but these two (title and date) are the minimum stuff that you will most likely write anyway for most pages. I also created index.md file with some text that will appear on the index page of my website.
Whatever you add to the content folder will appear on your website, not just Markdown files. Let’s say, you want to add an image and placed it in content/assets/picture.jpg, in your Markdown text you can add it using , so your content directory serves as an input root for your future website, and it’s true not for images only, but for links to other pages as well (e.g. [another page](page.md)); also, in case you are worried whether the links to md files will work—yes, they will, Luasmith will automatically turn them into links to generated html pages. And one more thing: it is highly recommended to write your links as relative to the current page, avoid root-relative links (e.g. [some page](/posts/some_page.md)) unless you are really sure that your website will be served from the root, otherwise the links will break; Luasmith checks that all relative links are correct and warns you if something is wrong.
After you wrote your content, there’s one thing that is needed to be added: the site.lua script, it should be created outside of your content directory (so in website, not website/content). This script should return a table containing some extra data for a website. In my case, I wrote this:
return {
    title = ';',
    subtitle = 'A blog of yet another geek',
    url = 'https://fita-slovo.grebedoc.dev/semicolon/',
}
The url field is necessary for the Atom feeds. If you don’t have your own domain, below in this tutorial I explain how to publish your website using Grebedoc or Codeberg Pages.
With some content and the site.lua created, a website can be built:
luasmith blog
Or, if you named you content directory differently (e.g. mypages), add the name of the directory as an extra argument (at least that’s the behavior in Luasmith 0.10, it may change in the future). You can also add one more argument for the name of the output directory (it is out by default):
luasmith blog mypages output
In milliseconds after running the command, you will get your website in the output directory. You can open the index.html file from the output directory in your web browser or start a server to navigate the generated website (e.g. using python3 -m http.server -d out).
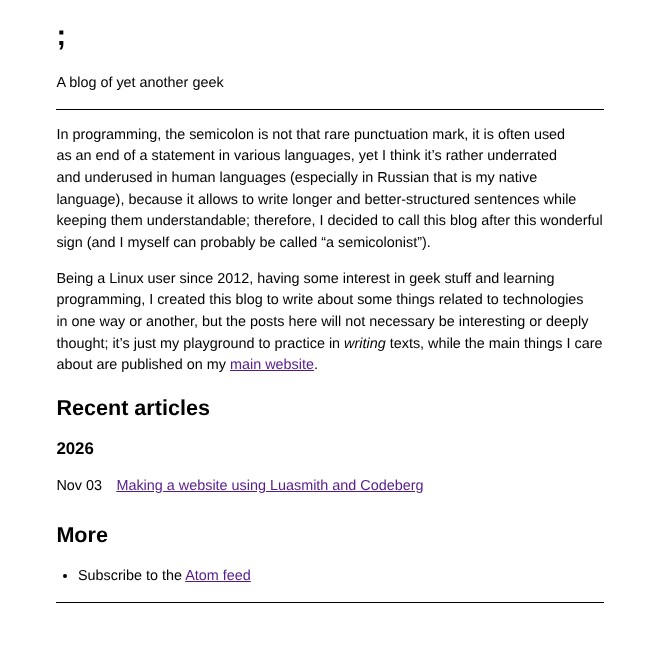
Luasmith themes
In the commands above, there’s that blog argument that I didn’t explain yet: this is a name of a Luasmith theme, the Blog theme is one of two built-in themes. A theme is not just a “skin”, a set of templates to define the look of generated websites, but it’s a whole pipeline that tells Luasmith what to do. Writing a custom theme is out of the scope of this tutorial, but you can start with the tutorial from Luasmith documentation if you really want to make your own—and I hope you will, because there are only a few themes available right now unfortunately. Still, you can notice that the website you are seeing right now doesn’t look the same as on the screenshot above, because I decided to use another theme called Nara, which I created not only for the different look, but also for some extra features (read more about them in the theme’s repository). And here’s how it can be added:
git submodule add https://codeberg.org/fita-slovo/luasmith-theme-nara.git themes/nara
git submodule update --init --recursive
Take a note that the theme was cloned into themes/nara, this way it’s possible to call luasmith nara to build the website instead of pointing to the theme.lua file (I would have to type something like luasmith luasmith-theme-nara/theme.lua). If there’s a need to update the theme (Nara is pretty much complete at this point, but I will definitely make some updates in the future), you can pull the changes from inside the theme’s directory:
pushd themes/nara
git pull --recurse-submodules
popd
I wanted to give the website a more “nerd-ish” look by using colors from the Solarized color palette (I guess it’s pretty recognizable) and by making the website title (that semicolon sign on the main page) blink like in a terminal; Nara allows me to do all that without changing the theme, in site.lua:
local colors = {
    light = {
        bg = "#fdf6e3",
        text = "#586e75",
        accent = "#d33682",
        dim = "#93a1a1",
        code = "#657b83",
    },
    dark = {
        bg = "#002b36",
        text = "#93a1a1",
        accent = "#d33682",
        dim = "#586e75",
        code = "#839496",
    }
}

return {
    title = ';',
    subtitle = 'A blog of yet another geek',
    url = 'https://fita-slovo.grebedoc.dev/semicolon/',
    colors = colors,
    customCss = [[
@keyframes blinker {
  50% {
    color: ]] .. colors.light.bg .. [[;
    background-color: ]] .. colors.light.text .. [[;
  }
}
p > code { color: ]] .. colors.light.code .. [[;}

@media (prefers-color-scheme: dark) {
    @keyframes blinker {
        50% {
            color: ]] .. colors.dark.bg .. [[;
            background-color: ]] .. colors.dark.text .. [[;
        }
    }
    p > code { color: ]] .. colors.dark.code .. [[;}
}

.site-title {
    animation: blinker 1s step-start infinite;
    font-size: 4em;
    margin: 2rem auto;
    font-family: monospace;
    width: fit-content;
}
    ]],
}
Now the website can be rebuilt using luasmith nara command, and after some milliseconds (in fact, Nara requires more time than Blog theme to rebuild a website, because its pipeline is significantly more complex) the website is almost ready to be published. Take a note that Nara uses pretty URLs by default, which (in my opinion) is great, but it prevents you from opening the website locally in your web browser from the filesystem (i.e. by opening the files from the output directory without running a server). If you don’t want to run the server when testing locally, but would like to keep pretty URLs when you publish the website, you don’t have to disable that feature of the theme, simply set NO_PRETTY_LINKS environment variable to any value when building to open locally, and unset the variable when you’re ready to build for publishing.
One more thing that is nice to do is to add a .gitignore file with the output directory listed there; this is useful because the files from the output directory will be pushed to a different branch and therefore should not be accidentally committed to the main branch.
Publishing
This tutorial should probably have been called “Making a website using Luasmith and echo 'codeberg' | rev”, because I publish the website on Grebedoc (which is the inverse of “Codeberg”), but I find placing code in a title to be ugly and also that title would be too long. Anyway, using Grebedoc is pretty much the same as using Codeberg Pages, only the target URL is different. So the next steps are:
- Create a repository on Codeberg;
- Add a webhook to publish the website from the
pagesbranch (the Codeberg Pages website has a good short instruction for it), the branch will be created later;
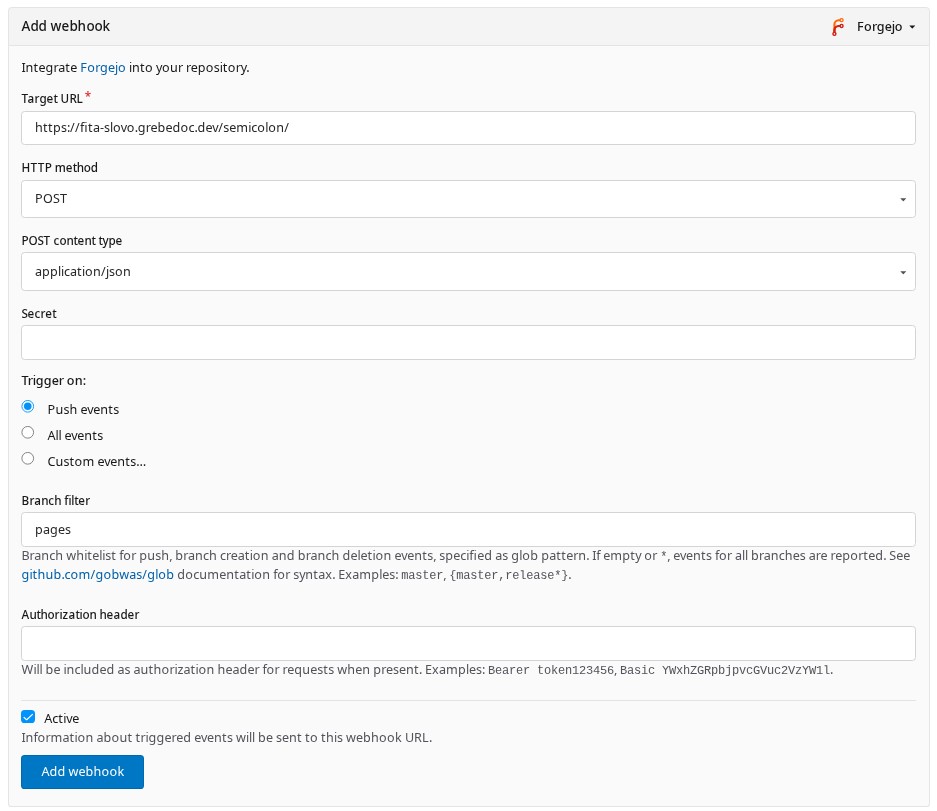
- Set the origin in the local git repository (Codeberg shows in empty repositories how to do this) and commit everything except the output dir.
Now, the tricky part: it’s time to create a git worktree in the output dir (it’s out in my case) that will point to the pages branch, so the sources of the website will be in the main branch, and the pages branch will only content the generated files that are actually needed to be hosted on Grebedoc.
rm -rf out
git worktree add --orphan -B pages out
luasmith nara
cd out
git add -A
git commit -m "Upload website"
git push --set-upstream origin pages
After it’s pushed, the webhook on Codeberg should get triggered and soon the website will appear live! The next time you need to update the website, you will not need to write --set-upstream …, just git push will work.
But now you have to be careful: do not remove the output directory completely or you’ll have to repeat setting up the worktree. Using rm -rf out/* is okay, because it keeps not only the directory itself, but also hidden files, including the .git file inside the output directory that is required to preserve the worktree. It is a good idea to create some script (s) for commands to work on the website, or, even better, a makefile:
LS=luasmith
C=content
O=out
S=site.lua

build: clean
    $(LS) nara $(C) $(O) $(S)

clean:
    [ "$(O)" ] || exit 1
    rm -rf $(O)/*

serve: build
    python3 -m http.server -d $(O)
You can change this file to be simpler if you want to, I just found it necessary to add all these variables for when I do experiments and test stuff in my Luasmith projects. By the way, that cryptic ["$(O)"] || exit 1 means “check that $(O) is not empty, or exit”, otherwise there’s a risk to replicate an old good Steam bug from 2015.
Hopefully after reading this tutorial you’ll use Luasmith to create great websites and make the Internet a better place.